8 Common Wood Router Problems [& Their Fixes!]
Are you struggling with your wood router? Do you find yourself constantly running into problems that are hindering your woodworking projects? Well, you’re not alone. Many woodworkers experience issues with their routers, but the good news is that most of these problems can be easily fixed.
In this article, we will discuss some of the common wood router problems that you may encounter, including issues with starting the router, burning, tearout, and chatter. We’ll also cover problems with bit fitting, uneven depth, dust collection, and a burning smell. By the end of this article, you’ll have a better understanding of the potential issues that can arise with wood routers and how to solve them. So, let’s dive in and get your router back up and running smoothly!
1. Router Won’t Start
Can’t get your router going? Don’t fret, let’s see what’s causing the problem and how we can fix it! If your router won’t start, the first thing to check is whether it’s properly plugged in. Sometimes, the plug can come loose or the outlet can be switched off without you realizing it. So, make sure the plug is tightly connected to the outlet and the router is switched on.
If the plug is connected and the outlet is switched on, but the router still won’t start, then it could be a problem with the cord or the switch. Check the cord for any visible damage or fraying, and if it looks fine, try pressing the switch multiple times to see if it’s stuck. If none of these solutions work, then it’s possible that the motor has burned out, in which case you’ll need to take it to a professional for repairs.
Another common reason why a router won’t start is because of a faulty power source. If you’re using an extension cord or a power strip, try plugging the router directly into a wall outlet to see if that solves the problem. Sometimes, these power sources can’t handle the amount of power needed to run a router, causing it to malfunction.
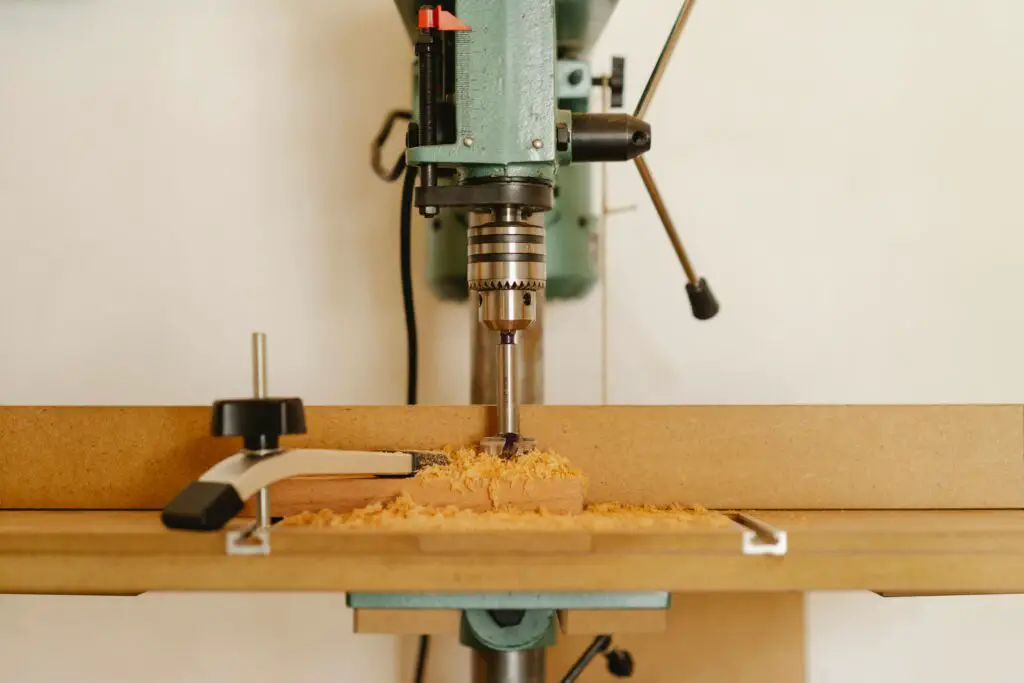
2. Router Burn
Experiencing a router burn while working on a project can be frustrating and costly in terms of time and materials. This problem occurs when the router bit spins too slowly and generates too much heat, causing the wood to burn. If you’ve encountered this issue, there are a few things you can do to prevent it from happening again in the future.
First, make sure you’re using the right router bit for the job. If the bit is too dull or too small, it may not be able to cut through the wood efficiently, causing friction and heat buildup.
Secondly, check the router’s speed settings. If the router is spinning too slowly, it may not be cutting through the wood quickly enough, causing heat buildup and burning. On the other hand, if the router is spinning too quickly, it may be generating too much heat and burning the wood as a result.
| COMMON CAUSES OF ROUTER BURNS | PREVENTION METHODS | SOLUTIONS |
|---|---|---|
| Dull or wrong router bit | Use the right router bit for the job | Replace the bit with the right one |
| Incorrect speed settings | Adjust the router’s speed settings | Adjust the speed according to the project requirements |
| Using too much force | Use a steady and gentle pressure | Apply a light and even pressure while routing |
| Poor quality wood | Use a higher quality of wood | Sand off the burnt areas or start over with a new piece of wood |
| Overheating | Allow the router to cool down between uses | Take breaks between routing sessions to prevent overheating |
Lastly, take care to avoid using too much force when routing. Applying excessive pressure can cause the bit to slow down and generate heat, leading to burns. Instead, use a steady and gentle pressure to guide the router through the wood.
3. Router Bit Not Fitting
You might run into an issue where your router bit doesn’t fit properly, but don’t worry, there are a few solutions to this problem. One reason why your router bit may not fit is because it’s the wrong size. Make sure to check the size of your router bit and the size of your router collet to ensure they match. If they don’t, you’ll need to purchase a new router bit that fits properly.
Another reason why your router bit may not fit is because there’s debris or dust in the collet. This can prevent the router bit from fitting snugly and securely. To fix this issue, simply clean out the collet with a brush or compressed air. This will remove any debris or dust that may be preventing the router bit from fitting properly.
If you’ve tried both of these solutions and your router bit still doesn’t fit, it may be time to replace the collet. Over time, collets can wear down and become less effective at holding router bits in place. If this is the case, you’ll need to purchase a new collet that’s compatible with your router. Make sure to check the size and compatibility before making your purchase.
- Check the size of your router bit and collet to ensure they match.
- Clean out the collet with a brush or compressed air to remove any debris or dust.
- Consider replacing the collet if it’s worn down and no longer effective.
- Make sure to purchase a new collet that’s compatible with your router.

4. Tearout
If you want to achieve a smooth and flawless finish on your project, avoiding tearout is crucial. Tearout is the term used to describe the rough and jagged edges that can occur when routing wood. It happens when the router bit cuts against the grain, causing the wood fibers to tear rather than cleanly cut. This can be frustrating and can ruin the look of your project.
One way to avoid tearout is to use a sharp router bit. A dull bit will not cut cleanly and will increase the likelihood of tearout. If you notice that your bit is dull, replace it before continuing with your project. Additionally, make sure your router is set to the proper speed for the type of wood you are working with. A speed that is too high can cause the bit to spin too fast, leading to tearout.
Another tip to prevent tearout is to use a backing board. A backing board is a piece of scrap wood that is placed behind the piece you are routing. This helps support the wood fibers and prevents them from tearing out as the bit cuts through. A backing board is especially useful when routing the end grain of wood, which is more prone to tearout. By using a backing board, you can achieve a cleaner and smoother finish on your project.
5. Chatter
Don’t let rough and uneven cuts ruin your woodworking project – the frustrating problem of chatter can be easily avoided with the right techniques. Chatter happens when the router bit vibrates and creates uneven cuts on the wood surface. Fortunately, you can prevent this issue by following these simple tips:
- Choose the right router bit: Chatter often occurs when using a bit that is too large or dull. Make sure to select the appropriate size and sharpness for your project. A sharp and smaller bit will make smoother and more even cuts.
- Adjust the speed: The speed of the router can also cause chatter. If your router is set too fast, it can cause the bit to vibrate and create uneven cuts. Adjust the speed to a slower rate and test on a scrap piece of wood before proceeding with your project.
- Secure your wood: Another cause of chatter can be an unsecured wood piece. Make sure to clamp or secure your wood piece before routing. This will prevent any unnecessary movement or vibration, resulting in a smoother and more even cut.
6. Burning Smell
When your nose detects a burning scent during woodworking, it’s important to address it immediately to prevent any potential damage to your project. A burning smell usually indicates that your wood router is overheating or that the bit is dull. If the router is overheating, it could lead to a fire, which is why you need to turn off the router and unplug it from the power source right away.
To address the burning smell, start by checking the router’s bit. If the bit is dull or damaged, it can generate heat and cause the burning smell. Replace the bit with a new one and make sure it’s properly installed. You should also check if the bit is too tight or too loose, as this can cause friction and generate heat. Adjust the bit’s tightness accordingly.
If the bit is not the issue, then the router might be overheating. Check if the router’s motor is clean and free from dust and debris. If it’s dirty, clean it using a soft cloth or a brush. You can also try moving the router to a well-ventilated area or using a fan to cool it down. However, if the burning smell persists, it’s best to take your router to a professional for repair.
7. Uneven Depth
Having trouble getting your cuts just right? Check for uneven depth in your project and use these tips to fix it. Uneven depth can cause your project to look unprofessional and can make it difficult to fit pieces together properly. Here are some tips to help you fix this issue:
- Check your bit: Uneven depth can be caused by a dull or improperly sized bit. Make sure that your bit is sharp and the correct size for the job.
- Adjust your depth settings: If your depth is uneven, you may need to adjust your depth settings. Double check your depth measurement before making any adjustments.
- Take smaller passes: Taking smaller passes can help ensure that your cuts are even. If you’re taking too much material off at once, it can cause uneven depth. Try taking smaller passes and see if that helps.
8. Dust Collection
Proper dust collection is crucial for both the safety of the user and the longevity of the equipment. When using a wood router, you may encounter issues with dust collection. It’s important to address these problems as soon as possible to ensure that you’re not inhaling harmful dust particles and that your tool is functioning properly.
One common issue with dust collection is that the dust port is clogged. This can happen when you’re using a wood router for an extended period of time without cleaning the dust port. To prevent this problem, you should clean the dust port regularly. You can also use a vacuum attachment to help remove dust and debris from the port.
Another issue with dust collection is that the dust collection system may not be powerful enough to collect all the dust and debris. This can be particularly problematic if you’re working on a large project. To address this issue, you may need to upgrade your dust collection system. The table below provides some examples of popular dust collection systems and their specifications.
| Dust Collection System | CFM (Cubic Feet per Minute) | Hose Diameter (Inches) | Price Range |
|---|---|---|---|
| Shop-Vac | 110-190 | 1.25-2.5 | $50-$200 |
| Festool | 137-148 | 1.25-2.5 | $500-$1000 |
| Oneida | 650-1500 | 2.5-6 | $300-$1500 |
| ClearVue | 600-1700 | 6 | $1000-$3000 |
| Laguna | 1189-2028 | 6 | $2000-$3000 |
By addressing dust collection problems, you can ensure that you’re working in a safe and healthy environment. Proper dust collection can also help extend the life of your equipment. By using the table above as a guide, you can choose the right dust collection system for your needs.