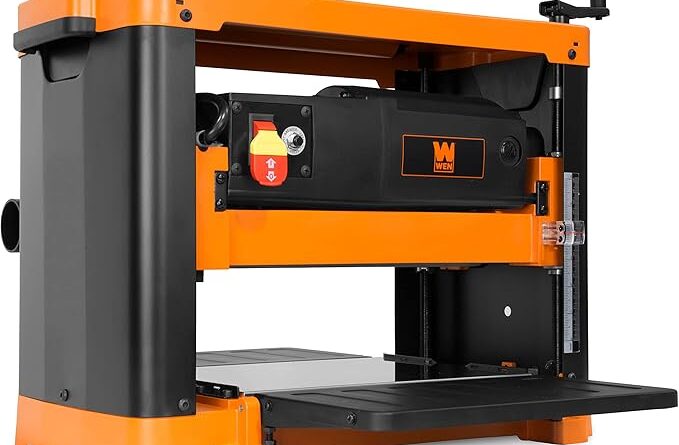
9 Common Wen Planer Problems [& Their Easy Fixes!]
Are you constantly frustrated with your Wen planer not working as it should?
Don’t throw in the towel just yet! We’ve got the ultimate guide to fixing those pesky problems that have been holding you back.
From dull blades to misaligned rollers, we’ll help you troubleshoot and get your planer running smoothly again.
With our step-by-step instructions, even a novice can become a pro at fixing common Wen planer issues.
So don’t wait any longer, let’s get started!
Wen Planer Not Turning On
It’s a huge bummer when your Wen planer won’t turn on. You’ve got projects to finish and now you’re stuck in the lurch. Don’t panic, though! Here are some tips for troubleshooting and getting your planer up-and-running again:
- Check the power cord.
If it’s not plugged in or if there are any frayed spots, replace it with an appropriate replacement. Test the outlet as well to make sure that it’s working properly. If neither of these remedies work, then move onto step two.
- Look at the fuse.
The fuse is located behind a panel on the side of most Wen planers. Check to see if it needs to be reset by turning off all power sources before flipping the switch back on. If this doesn’t work, try replacing the fuse altogether.
- Inspect any switches.
Make sure they’re set correctly and not flipped into a “Off” position accidentally –– this could be why your Wen planer isn’t turning on! If all looks good here, it may just need a little TLC from time to time.
Finally, “when all else fails” , contact customer service for further assistance or take a look at their website for more information about potential solutions. With a few simple steps –– plus maybe some elbow grease –– you can get your Wen planer running like new again in no time!
Wen Planer Blade Issues
Dealing with Planer Blade Issues can be a real headache. Whether you’re an experienced woodworker or just starting out, it’s important to know what to do when your planer blades start giving you trouble. Here are some tips for keeping those pesky problems at bay:
- Check blade alignment. If the blades aren’t properly aligned, they won’t cut straight and will create rough edges on your project. Use a square to check that your blades are parallel to each other and perpendicular to the bed of the planer.
- Sharpen blades regularly. Dull blades lead to chipping and tear-out, so make sure you sharpen them regularly (about every 15 hours of use). You can do this yourself or take them in for professional sharpening once or twice a year.
- Replace dulled blades. Over time, even sharpened planer blades will eventually become too dull. When that happens, it’s best to replace them altogether as trying to keep using them could cause further damage down the line.
To ensure your machine stays in peak condition, check out our guide on how long planer blades last and how to extend their life.
Wen Planer Not Feeding Wood
No wood? No problem!
If your Wen Planer isn’t feeding wood, there are a few things you can do to get it back up and running.
First off, check the rollers, as they may be clogged with debris. You’ll need to give them a good cleaning or replace them if they’re damaged. Next, make sure that your blades are sharp and properly aligned – dull or misaligned blades won’t cut through the wood. Finally, ensure that the feed rate is set correctly; if it’s too fast or slow for the material being planed, it could cause an issue with feeding.
If all else fails and you still can’t get your planer working properly, consider taking it in for servicing. A professional technician will be able to diagnose and repair any issues quickly so you can get back to work in no time! Just remember: prevention is better than cure. Taking care of your tools on a regular basis will save you from having to deal with more serious problems down the line.
Wen Planer Clogging
Planer clogging is a common issue that can cause major headaches for woodworkers. It’s the last thing you want to happen when you’re in the middle of a project, but it does happen. Thankfully, there are some simple ways to tackle this problem and get your planer up and running again in no time.
First things first: turn off the power switch before attempting any repairs or maintenance on the machine. Safety should always come first! Once that’s taken care of, you’ll need to remove all debris from inside the planer using an air compressor or vacuum cleaner – whatever works best for you. This will help restore proper airflow and reduce clogs down the line.
Next, it’s important to check for buildup on blades. A few swipes with a soft cloth should do the trick; if there’s still visible gunk after wiping then use a blade sharpener or honing stone to gently clean away any unwanted material stuck on them. Make sure not to overdo it though as too much pressure could damage your blades beyond repair!
Once everything is looking good, inspect hoses. If they’re blocked by sawdust or other debris then unblock them using tweezers or compressed air – whichever works better for your situation – so that air can flow freely through without obstruction once more. You may also want to check if there are any loose connections which could be causing issues as well; these should be tightened up with a wrench right away so they don’t cause further problems down the line.
Finally, take some time every now and then to clean out your dust collector bag. This will help ensure optimal performance from your planer by reducing clogs before they even start forming!
It’ll also save you time in future because cleaning out dust bags regularly takes very little effort compared with dealing with full-blown blockages later on down the track – like trying to unclog a plugged sink drain after months of neglecting basic maintenance!
With these tips in mind, hopefully won’t be an issue anymore – keeping your projects flowing smoothly without interruption!
Wen Planer Not Cutting Evenly
No one likes it when their planer isn’t doing its job properly. Whether you’re a professional woodworker or a hobbyist, the last thing you want is uneven cuts. Unfortunately, this problem can crop up from time to time as your tools get used and abused over the years.
But don’t despair! There are some simple steps that can help restore your planer to its former glory. Here’s how:
- Clean & Sharpen Blades: The first step in getting good results with your planer is making sure the blades are clean and sharp. Use a wire brush to remove any debris or buildup on the blades and then sharpen them using a honing stone or grinding wheel.
- Check for Uneven Feeds: If your feed rate is too slow, it can cause problems with an even cut. Check that all of the rollers in your machine are spinning freely and at an equal speed.
- Check for Misaligned Parts: Over time, parts on your machine may become misaligned which could be causing uneven cuts. Inspect each part of the machine – including bed plates, fence guides, etc – to make sure they’re aligned correctly.
Finally, make sure everything’s running smoothly by lubricating parts where needed. This will help ensure that all components work together harmoniously to produce perfect results every time! With these tips in mind (and maybe some elbow grease), you should have no trouble getting those boards cut evenly again.
If you are just starting your workshop journey, you might also find our review of the best hand planers for beginners helpful for those smaller detail tasks.
Wen Planer Motor Overheating
When a Wen planer motor is overheating, it’s important to address the issue right away. If you don’t take care of it immediately, the problem can worsen and cause irreparable damage. There are several causes of an overheated motor and some steps you can take to get it running smoothly again.
- The first thing to do is check for blockages in the fan or vents that could be preventing proper ventilation.
- Then inspect your blades for any chips or nicks that might be causing additional friction.
If either of these two issues are present, they need to be taken care of immediately before further use can occur. Once those issues have been addressed, there are a few other things that should be checked:
- Make sure that all electrical connections are secure and properly connected.
- Check the supply voltage – if it’s too high then reduce it.
Additionally, make sure everything else on your machine is functioning properly as well; this includes checking belts and pulleys for wear or misalignment. Finally, if all else fails consider replacing the motor with a new one! This may seem drastic but sometimes old motors just give out after years of hard work.
In short, when dealing with an overheated Wen planer motor there are various things you should try before giving up hope – from cleaning out debris to ensuring voltage levels are correct – so always keep your eyes open for potential problems and tackle them head-on!
Wen Planer Belt Slipping
Belt slipping can be a real pain. There’s nothing more frustrating than having your work interrupted by a slipping belt issue. Luckily, there are some easy steps you can take to get things back in order and keep the belt from slipping again.
First of all, check the tension of the belt. If it’s too tight or too loose, it won’t grip correctly and will likely slip off more often than not. To adjust the tension, use an appropriately sized wrench or socket to loosen and tighten as needed until it is snug but still allows for smooth movement without binding up.
Next, take a look at the pulleys. Make sure they’re not bent or out-of-shape in any way that could cause them to impede proper alignment with each other and disrupt normal operation of the planer belt. If they need adjusting or replacing altogether then do so accordingly before continuing onto further troubleshooting measures.
Finally, inspect for debris on either side of the belt. Any small particles like sawdust or wood chips can easily find their way into this area and cause friction between surfaces which results in slippage over time due to wear and tear on both sides of the connection point—the pulley systems themselves being no exception! Cleaning these areas thoroughly should help reduce potential issues here as well.
Now that everything has been inspected (and hopefully fixed) it’s time to give it another go! Start up your Wen Planer once again and see if there have been any improvements in its performance; if not then you may want to look into additional solutions such as lubricating components along with further diagnostics that might reveal underlying causes for why your planer isn’t running properly.
Wen Planer Dust Collection Problems
Planers are a great tool for woodworking projects, but when the dust starts to fly, it can be overwhelming. Fortunately, there are a few tricks and tips that can help you keep your shop clean and safe. Here’s how to tackle planer dust collection problems:
- Invest in a good quality dust collector – A powerful dust collector is essential for catching all of the shavings created during planing operations.
- Use an air filter – An air filter will help reduce airborne particles and make sure your shop stays clean.
- Install an overhead hood – Placing a hood over the planer helps contain as much of the sawdust as possible before it has a chance to escape into the air.
- Set up extraction ports – Extraction ports should be set up near each machine or workstation so that any dust generated is immediately sucked away from where you’re working.
By following these simple steps, you’ll be able to get on top of your planer dust collection problems in no time!
Wen Planer Snipe Issues
If you’re facing snipe issues with your Wen planer, you’re not alone.
And there are steps you can take to rectify the situation. Don’t let snipes get you down; stay on top of your woodworking game with these tips.
1. Set the infeed and outfeed tables correctly. This is crucial to prevent snipe, as it keeps the board level throughout the cutting process. Be sure to adjust them to the same height as the cutting head.
2. Check the blades for damage or wear. Dull or nicked blades can contribute to snipe issues. Keep a close eye on the blades for any signs of wear, and replace them as needed.
3. Slow and steady wins the race. Avoiding snipe is all about maintaining a consistent speed and feed rate. Take your time, and don’t try to rush the process.
4. Use auxiliary support. A simple but effective solution for snipe is to use infeed and outfeed supports for longer boards. This helps to maintain the level of the board and prevent it from sagging, reducing the likelihood of snipe.
5. Don’t forget about chip collection. Chips and debris can get caught under the board, causing it to shift and resulting in snipe.
Make sure you have a proper chip collection system in place to keep your workspace clean and your boards level.
Remember, snipe issues can be frustrating, but they don’t have to get the best of you.
Keep these tips in mind and stay on top of your woodworking game.
With a little patience and know-how, you can achieve smooth, snipe-free cuts with your Wen planer.
Final Thoughts
Well folks, we’ve covered some of the most common issues that arise when using a Wen planer, so let’s wrap it up in plain English for ya.
First and foremost, keep in mind that preventing problems is always better than solving them.
Sharpen your blades regularly and keep an eye on your power supply to avoid overloading your planer.
Next up, let’s talk about the biggie: snipe. This pesky problem occurs when your planer cuts too deeply at the beginning or end of a board, leaving a groove that can ruin your project.
To avoid this, make sure your infeed and outfeed tables are level, and use sacrificial boards to help support your workpiece.
Another issue that can crop up is tearout, which happens when the grain of your wood gets caught in the blades and gets ripped out. Use a slower feed rate and take shallow passes to minimize this problem.
And last but not least, always wear proper safety gear and follow your planer’s manual to avoid injury and damage to your machine.
So there you have it, folks.
Keep your blades sharp, your tables level, and your feed rate slow, and you’ll be planing like a pro in no time. And if all else fails, call in the experts for some professional help.


