9 Common Powermatic Planer Problems
Are you frequently encountering problems with your Powermatic planer? Don’t worry, you’re not alone.
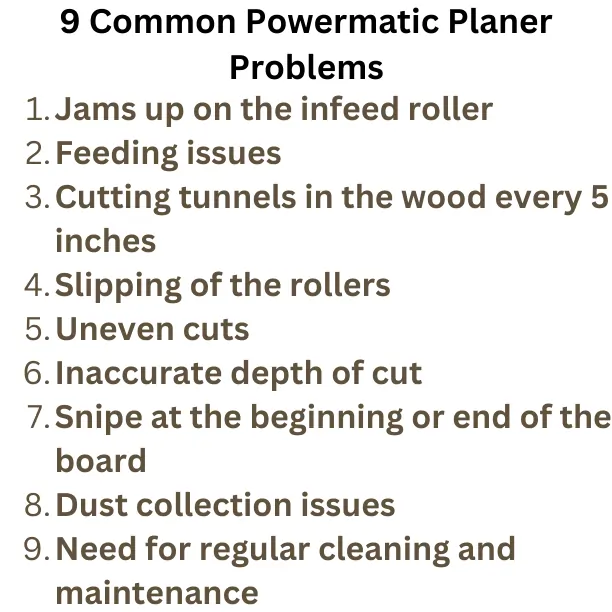
In this article, we will discuss nine common issues that many Powermatic planer users face and provide you with practical solutions to tackle them head-on.
From jams on the infeed roller to feeding issues and uneven cuts, we’ve got you covered. By understanding these common problems and their causes, you’ll be better equipped to troubleshoot and resolve them effectively.
So, let’s dive in and learn how to overcome these frustrating hurdles that can hinder your woodworking projects and productivity.

Jams up on the infeed roller
Sometimes, your powermatic planer just gets all jammed up on that pesky infeed roller. It can be frustrating when you’re trying to smoothly feed your wood through, but it keeps getting stuck. One common cause of this problem is a buildup of debris on the roller. Sawdust and wood chips can accumulate over time, causing the roller to lose its grip on the wood. To fix this, you’ll need to clean the roller thoroughly. Use a brush or vacuum to remove any loose debris, and then wipe it down with a clean cloth. This should help restore the grip and prevent future jams.
Another possible cause of jamming on the infeed roller is a misalignment between the roller and the planer bed. If the roller is not properly aligned, it can cause the wood to get stuck or feed unevenly. To check for misalignment, start by unplugging the planer and removing the dust chute. Then, manually rotate the roller and observe its movement. If it wobbles or doesn’t spin smoothly, it may need to be adjusted. Refer to your planer’s manual for instructions on how to align the roller correctly. By addressing these common issues with the infeed roller, you can ensure that your powermatic planer operates smoothly and efficiently.
Feeding issues
To improve your planing experience, ensure that you’re feeding the wood smoothly into the machine without any sudden jerks or hesitations. When you feed the wood too quickly or unevenly, it can cause feeding issues and result in an uneven finish on your wood. Take your time and apply steady pressure as you guide the wood through the planer. This will help to prevent any jams or clogs in the machine and ensure a smooth and consistent feed.
Another important thing to consider is the condition of the blades on your powermatic planer. Dull or damaged blades can cause feeding issues as they may struggle to properly cut through the wood. It’s essential to regularly check and sharpen or replace the blades as needed to maintain optimal performance. Additionally, make sure that the blades are properly aligned and securely fastened in the planer. Loose or misaligned blades can cause the wood to be fed unevenly and result in feeding issues. By following these tips, you can avoid feeding problems and achieve a smooth and efficient planing process with your powermatic planer.
Cutting tunnels in the wood every 5 inches
Ensure you create decorative tunnels in the wood every 5 inches, adding a unique and visually appealing touch to your woodworking projects. Cutting tunnels in the wood at regular intervals can be a common problem with powermatic planers. This issue is usually caused by a dull or improperly adjusted cutter head. When the cutter head is not sharp enough, it can leave behind uneven cuts that result in tunnels in the wood. To fix this problem, you will need to sharpen or replace the blades on your planer. Make sure to follow the manufacturer’s instructions for blade replacement and adjustment to ensure proper cutting depth and alignment.
Another possible cause of cutting tunnels in the wood every 5 inches is incorrect feed speed. If the wood is being fed too quickly through the planer, it can cause the cutter head to remove too much material at once, resulting in tunnels. On the other hand, if the wood is being fed too slowly, it can cause the cutter head to linger in one spot, creating a depression or tunnel in the wood. To avoid this issue, adjust the feed speed according to the hardness and thickness of the wood you are working with. Experiment with different feed speeds until you find the right balance that allows for smooth and even cuts without creating tunnels. Remember to always feed the wood evenly and consistently to prevent any variations in the cutting depth.
Slipping of the rollers
The frustrating slipping of the rollers can greatly hinder the progress and smoothness of your woodworking projects. It can be incredibly frustrating to have your powermatic planer’s rollers slipping and causing issues with the wood feed. Here are four ways this problem can impact your work:
- Uneven cuts: When the rollers slip, they fail to grip the wood properly, resulting in uneven cuts. This can ruin the overall finish of your project and make it difficult to achieve the desired dimensions.
- Wasted material: As the rollers slip, the wood may not feed through the planer consistently. This can lead to wasted material, as the planer may remove more wood from certain areas while leaving others untouched.
- Safety concerns: Slipping rollers can create a dangerous situation. If the wood is not properly held in place, it may kickback or become unstable during the planing process. This poses a risk of injury to the operator and can also damage the wood.
- Time-consuming adjustments: Constantly dealing with slipping rollers requires frequent adjustments and interruptions to your workflow. This can be time-consuming and frustrating, as it slows down the progress of your woodworking projects.
To ensure smooth and efficient operation, it is essential to address the issue of slipping rollers in your powermatic planer. Regular maintenance, such as cleaning and lubricating the rollers, can help prevent this problem. Additionally, checking for any loose or worn-out parts and making necessary adjustments or replacements can go a long way in maintaining optimal performance.
Uneven cuts
Slipping rollers can result in an unsatisfactory finish and make it challenging to achieve precise dimensions, causing frustration for woodworkers. When the rollers on your powermatic planer start to slip, it can lead to uneven cuts in your wood. This issue occurs when the rollers fail to grip the wood properly, causing it to move inconsistently through the planer. As a result, you may end up with boards that have varying thicknesses or surfaces that are not smooth and flat.
To address this problem, you can start by checking if the rollers are clean and free from any debris or residue that could affect their grip. Wipe them down with a clean cloth and remove any build-up that may be present. Additionally, make sure that the pressure on the rollers is properly adjusted. If the pressure is too low, the wood may slip, but if it’s too high, it can cause damage to the wood or the planer itself. Finding the right balance is crucial for achieving even and consistent cuts.
Uneven cuts caused by slipping rollers can be frustrating for woodworkers. By keeping the rollers clean and adjusting the pressure properly, you can minimize this issue and achieve the precise dimensions you desire. Remember to regularly maintain your powermatic planer to ensure optimal performance and a smooth woodworking experience.
Inaccurate depth of cut
When the depth of cut on your powermatic planer is inaccurate, it can compromise the precision of your woodworking projects and leave you with less-than-desirable results. The depth of cut refers to how much material is being removed with each pass of the planer. If it is not set correctly, you may end up with uneven surfaces or cuts that are too shallow or too deep. This can be frustrating and time-consuming, as you may have to spend extra time sanding or planing the wood to achieve the desired thickness.
There are a few common reasons why the depth of cut on a powermatic planer may be inaccurate. First, it could be due to a misalignment of the planer’s blades. If the blades are not properly aligned, they may not be cutting at the correct depth. To fix this issue, you will need to adjust the blades so that they are parallel to the planer’s bed. Another possible cause of an inaccurate depth of cut is a dull blade. A dull blade will not cut as effectively, resulting in uneven cuts. In this case, you will need to replace the blade with a sharp one. Finally, the depth adjustment mechanism on the planer may be faulty or worn out. If this is the case, you may need to repair or replace the mechanism to ensure accurate depth of cut. By addressing these potential issues, you can improve the accuracy of your powermatic planer’s depth of cut and achieve better woodworking results.
Snipe at the beginning or end of the board
One frustrating issue woodworkers often encounter is snipe at the beginning or end of their boards. Snipe refers to a deeper cut or indentation that occurs at the very beginning or end of a board when it passes through the planer. It can be quite frustrating because it can ruin the overall appearance and smoothness of the board, requiring additional sanding or planing to fix. However, there are several ways to minimize or even eliminate snipe:
- Adjust the infeed and outfeed tables: Ensuring that the tables are level and properly aligned with the planer bed can help reduce snipe. Make sure they are at the same height as the planer bed and adjust them so they are slightly higher at the ends.
- Support the board: Providing extra support for the board as it enters and exits the planer can help reduce snipe. Using auxiliary tables or roller stands can help keep the board level and prevent it from dipping at the ends.
- Take lighter passes: Reducing the depth of cut can help minimize snipe. Instead of trying to remove a large amount of material in one pass, take lighter passes by adjusting the depth of cut to a smaller increment.
- Use sacrificial boards: Placing sacrificial boards at the beginning and end of the board being planed can help reduce snipe. The sacrificial boards can absorb the initial and final cuts, preventing the main board from getting damaged.
By implementing these techniques, woodworkers can greatly reduce or eliminate snipe at the beginning or end of their boards, resulting in smoother and more professional-looking finished pieces.
Dust collection issues
To improve your woodworking experience, tackling dust collection issues can make a significant difference. One common problem with powermatic planers is that they may not have an effective dust collection system. This can result in sawdust and debris flying everywhere, making a mess in your workshop and affecting the quality of your work.
To address this issue, start by checking if the dust collection port is properly connected and not clogged. Ensure that the hose is securely attached and that there are no leaks. You may also want to consider using a dust collector or shop vacuum to provide additional suction and improve the efficiency of the dust collection system. Additionally, make sure to regularly clean out the dust collection bag or canister to prevent clogging and maintain proper airflow. By taking these steps, you can minimize the amount of sawdust that escapes into the air, creating a cleaner and healthier working environment.
Remember to always prioritize safety when working with powermatic planers and other woodworking tools. Wearing a dust mask and safety goggles can help protect you from inhaling harmful particles and prevent eye injuries. Don’t underestimate the importance of dust collection – it can greatly improve both the cleanliness of your workshop and the overall quality of your woodworking projects.
Need for regular cleaning and maintenance
Regular cleaning and maintenance are essential for ensuring the longevity and optimal performance of your powermatic planer, creating a sense of pride and satisfaction in your woodworking endeavors. By taking the time to regularly clean and maintain your planer, you can prevent common issues such as clogged dust collection systems, dull blades, and uneven cutting results. It may seem like an extra task to add to your already busy woodworking routine, but trust me, it’s worth it. Not only will regular cleaning and maintenance extend the life of your planer, but it will also ensure that it operates at its peak efficiency, saving you time and frustration in the long run.
To help you stay on track with your planer maintenance, here’s a handy table that outlines some key cleaning and maintenance tasks and how often they should be performed:
| Task | Frequency |
|---|---|
| Cleaning the dust chute | After every use |
| Checking and cleaning the blades | Monthly |
| Lubricating the moving parts | Quarterly |
| Inspecting and cleaning the feed rollers | Semi-annually |
| Checking and adjusting the planer’s settings | Annually |
By following this simple maintenance schedule, you can ensure that your powermatic planer remains in top-notch condition, allowing you to tackle your woodworking projects with ease. Remember, a little bit of regular upkeep goes a long way in preserving the performance and longevity of your planer, so don’t neglect this important aspect of woodworking. Your planer will thank you, and you’ll be rewarded with smooth, precise cuts every time you use it.