Is a Drywall Sander Worth It? [Read Before You Buy!]
For most homeowners or DIYers taking on medium to large drywall projects, investing in a quality drywall sander is absolutely worth the cost.
The time savings compared to hand sanding along with the ability to easily sand high ceilings and the superior smooth finishes achievable make drywall sanders a very worthwhile purchase. Unless you only do occasional minor drywall repairs and have a very limited budget, a drywall sander will provide excellent value by dramatically reducing sanding time and effort while also enhancing the end results. The higher initial investment will pay off with years of use and better looking drywall finishes.
Key Features of Drywall Sanders
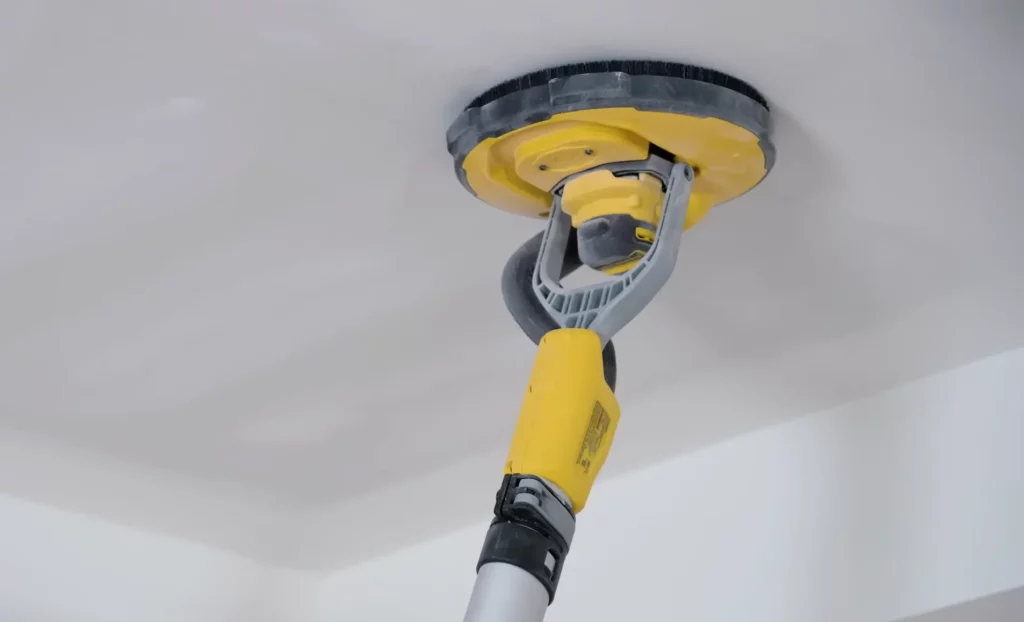
- Lightweight pole and head for less fatigue during overhead sanding
- Variable speed settings from 1500-2000 RPM for control
- Removable dust bag to contain drywall dust while sanding
- Uses common sandpaper sheets cut into circles
- Padded handles for grip and comfort
- 6-15 foot extendable poles for high ceilings
Factors Determining If A Drywall Sander Worth It
Whether or not investing in a drywall sander is worthwhile depends on several factors:
Project Size
For small DIY drywall repairs or finishing a bathroom, hand sanding will often be sufficient. But for larger ceiling and wall jobs or finishing an entire home, a sander can provide major time savings and better overall results.
Frequency
Occasional DIYers may not use a sander enough to justify purchasing one. They can get by with hand sanding for the few drywall jobs they tackle. For professional drywall finishers or dedicated hobbyists, a sander gets used enough to be worth owning.
Budget
The $100+ price of entry level pole sanders may not work for limited DIY budgets. Occasional drywall repairs can be hand sanded on a budget. For contractors, the time savings offsets sander costs quickly through higher productivity per job.
Ceiling Height
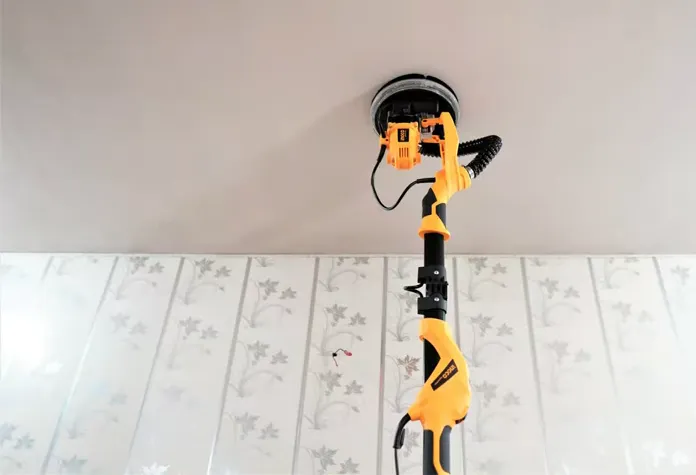
Homes with standard 8 foot ceilings are reasonably accessible by hand. But cathedral ceilings over 10 feet tall become very difficult to hand sand overhead. The extendable pole on a sander makes high reaching much easier.
Health Factors
Those with back problems or joint pain should avoid the twisting motions of hand sanding overhead. A sander on a pole puts less strain on the back and shoulders. Hand sanding also creates more airborne dust exposure.
For large drywall jobs, professional finishers, or homes with high ceilings, investing in a drywall sander is highly recommended for efficiency and quality results. For smaller DIY repairs, hand sanding is usually sufficient. Evaluate your specific needs and situation.
Drywall Sander Pros & Cons
Here are some of the main benefits of using a drywall sander versus hand sanding:
Speed
A drywall sander can cover a wall exponentially faster than by hand. The motorized sanding head oscillates rapidly to quickly smooth out joints, beads, and skim coats applied during drywall finishing. Hand sanding is tiresome and time consuming in comparison.
Reduced Dust
The removable dust bag on a drywall sander contains most of the gypsum dust right at the source. Hand sanding with a sanding block or pole creates billowing clouds of fine powder that drifts and settles throughout the room. A sander contains it for an easier cleanup.
Accessibility
The pole on a drywall sander allows you to reach walls and ceilings up to 15 feet high without ladders or scaffolding. Hand sanding overhead is difficult and messy. The variable extensions provide the right length pole for each job.
Consistency
A drywall sander’s constant motion creates a flawless, uniform finish. It’s nearly impossible to match that consistency sanding by hand due to variations in pressure and direction. Power sanding eliminates swirl marks and valleys for a professional look.
Less Physical Strain
Due to the pneumatic sanding head, drywall sanders require far less physical pressure than hand sanding. Less strain means less fatigue, especially when finishing large areas. Hand sanding can quickly become tiring and even painful.
Drawbacks of Drywall Sanders
While drywall sanders have some clear advantages, there are also a few downsides to consider:
Dust Requirements
Despite the dust collection bag, drywall sanding still creates a lot of airborne dust that requires masking and drop cloths. You’ll also need to thoroughly clean the space afterwards. Hand sanding can be less messy if done carefully.
Learning Curve
It takes some practice to learn proper drywall sander technique and control. Beginners often apply too much pressure and over-sand, or go too fast and leave swirls. Developing a smooth, steady motion has a learning curve.
Access Limitations
The pole sander can’t reach into tight corners or angles. That means hand sanding is still required to finish edges and do detail work that the sander can’t maneuver into. Combining hand and power sanding is ideal.
Edge Swirling
It’s easy to accidentally create swirling marks along drywall seams and edges if you aren’t very careful with sander technique. Light pressure and single directional strokes are key to prevent visible swirl marks.
Cost
Drywall sanders represent an added cost on top of basic hand sanding tools. Pole sanders range from $100 to $300 depending on size and features. Hand sanding requires only simple blocks and paper that most DIYers already own.
What to Look for In a Drywall Sander
If you decide that adding a drywall sander to your tool arsenal is worthwhile, here are some key features to look for:
Variable Speed Dial
Look for a sander with adjustable RPM settings, usually in the 1500 to 2000 RPM range. This allows you to find the ideal sanding speed for the task at hand and prevent over-sanding.
Dust Collection Bag
A removable dust bag is essential to contain the gypsum dust and minimize cleanup. Bags that fully enclose and seal the sanding head work best. Look for durable cloth construction.
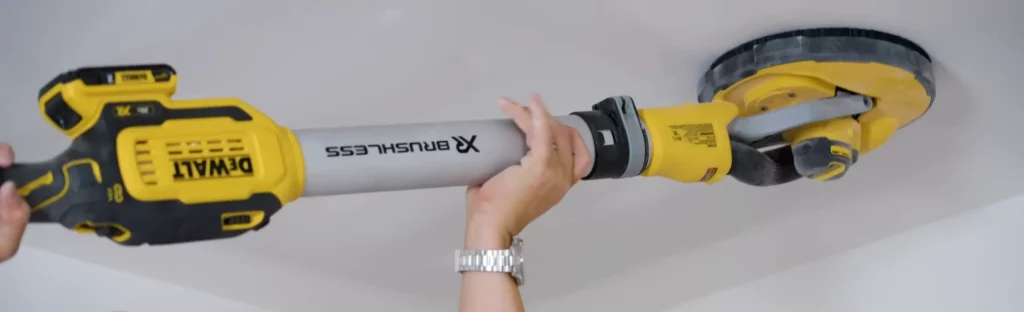
Extendable Pole
Seek out a pole that extends from 6 to 15 feet to tackle walls and ceilings of any height. Customizable length is ideal for optimizing your reach overhead or when working close.
Lightweight Design
Since you’ll be holding overhead frequently, opt for a sander that is fairly lightweight for its size at under 10 pounds. This prevents early fatigue from setting in.
Easy Paper Changes
The sandpaper sheets should swap on and off easily without tools for quick changes when worn out. Disposable paper is much more efficient than re-usable sanding disks.
Padded Grip Areas
Padding on the pole and handles prevents slips and absorbs vibrations for a more comfortable grip, especially during extended overhead work. This leads to less hand and arm fatigue.
Orbital Sanding
A circular orbital pattern sands more efficiently than simple spinning, leaving less swirl marks. Combined with variable speed settings, you can fine tune the motion.
Tips for Using a Drywall Sander Effectively
Once you’ve selected the right sander for your needs, here are some tips to use it effectively:
Light Pressure
Avoid pushing too hard as this can rapidly wear the abrasive paper and also create visible swirls or valleys in the drywall finish. Let the sander do the work.
Keep it Moving
Prevent lingering in one spot which can over-sand and dish out the area. Maintain an even back and forth motion. Use a lower speed for greater control.
Mind the Edges
Use extra care when sanding near corners or seams to avoid rounding them over or creating edge swirl marks. Angle the sander slightly and use lighter pressure.
Follow with Hand Sanding
The sander can’t reach everywhere. Finish up by hand sanding corners, edges, and detail areas for a seamless uniform sand.
Work Pole to Floor
Start sanding high overhead areas first, then work your way down the walls. This avoids raising dust up into already sanded spots.
Don protective gear
Wear a dust mask and eye protection to limit exposure to airborne drywall dust. Wear ear protection if you will be sanding for prolonged periods.
Clean as you go
Use a vacuum with a HEPA filter regularly during sanding to keep dust under control, rather than waiting until the end.

Step-by-Step Instructions
Here is a step-by-step guide to sanding drywall effectively with a pole sander:
1. Prepare the Workspace
Clear furniture and flooring and lay down tarps to protect from dust. Cover nearby surfaces with plastic sheeting and mask off any areas not being sanded.
2. Attach Abrasive Paper
Select an appropriate grit of sandpaper, typically 120 to 150 grit. Cut a sheet into a circle using the sander’s head as a template. Remove any backing and adhere it onto the sanding pad.
3. Connect Pole Extensions
Adjust the pole length with extensions to comfortably reach the area you’ll be starting with overhead. It’s easier to remove sections than to add them mid-job.
4. Connect Dust Bag
Attach the reusable dust collection bag securely onto the sander following the manufacturer’s instructions. Make sure the bag opening seals tightly around the sanding head.
5. Turn Sander On
Plug in the sander, set it to the minimum speed and turn it on. Make sure it runs smoothly before operating it on the wall. Increase speed as needed.
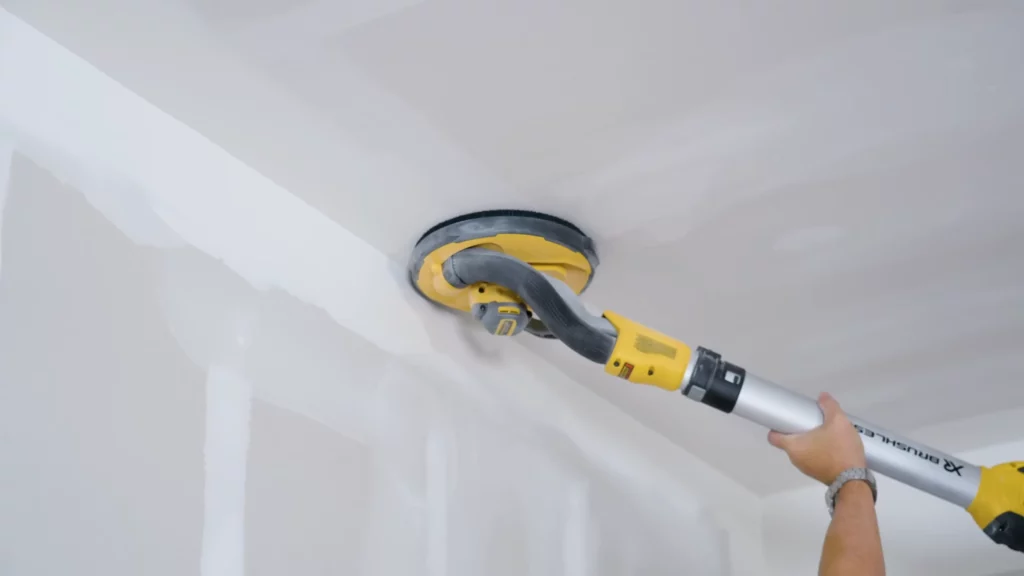
6. Begin Sanding High Overhead
Positioning the sander flat against the wall, work in overlapping back and forth motions, moving across the ceiling or highest areas first. Apply light even pressure.
7. Work Downward Gradually
Once the highest section is uniformly sanded, lower the pole height by a few feet and repeat the sanding process working your way down the walls towards the floor.
8. Hand Sand Edges and Details
Use a sanding block or sponge to blend corners, edges and details by hand that the sander couldn’t reach. Feather them into the sanded areas.
9. Remove Dust Bag and Clean
When finished sanding, unplug the sander, detach the dust bag and dispose of the contents. Use a HEPA vacuum to thoroughly remove remaining dust before priming or painting.
Finding the Right Sander for Your Needs
Choosing the best drywall sander depends on your specific needs and goals:
For DIYers:
- Porter Cable 7800 – Budget-friendly at around $100 but gets the job done for most basic drywall jobs. 6-10 foot pole.
- WEN 6369 – Under $150 with variable speeds, auto sanding head, and 7.5 to 13 foot reach. Good for DIYers doing their whole home.
For Professionals:
- Festool Planex Easy – Around $600 but extremely lightweight and powerful with variable speed. Expensive but worth it for full time pros.
- Porter Cable 7800X – An upgraded professional version of the 7800 with more power and 9-15 foot pole for around $250. A great mid-range choice.
- Makita 9403 – Very popular with drywall contractors due to its 11 AMP motor and smooth sanding. Extends from 5 to 16 feet.
Any of these models will be a major improvement over hand sanding for large drywall jobs. Compare key specs and prices to choose the best pole sander for your needs and skill level.
Alternatives to Drywall Sanders
While drywall sanders are very efficient tools, there are some alternatives to consider:
Orbital Sander
A standard orbital or palm sander can be fitted with 120 grit sandpaper and used for smoothing drywall. However, the lack of variable speed and a swiveling sanding head limit their effectiveness compared to a dedicated drywall sander. The short reach also makes ceilings difficult.
Power Drywall Files
These use a filing action rather than sanding to smooth joints and beads. They are faster than pole sanders on the initial pass but less effective at feathering out imperfections overall. Power files also create substantial dust.
Vacuum Sanding Systems
Some higher end systems connect the sander to a powerful shop vacuum to provide superior dust collection. However, these systems are quite expensive starting around $800. They are best suited for professional drywall contractors.
Sanding Sponges and Poles
For DIYers on a budget, using sanding sponges on the end of a painter’s pole can achieve decent results. However, this is still much slower and more physically demanding than power sanding. Areas may be missed and swirl marks are likely.
Maintaining and Troubleshooting Drywall Sanders
Proper maintenance and storage extends the lifespan of drywall sanders. Here are some key tips:
Clean thoroughly after use
Remove all drywall dust from the sander, pole, and accessories to prevent clogging and deterioration. Wipe down with a dry cloth.
Inspect abrasives frequently
Check the sanding discs and replace immediately when they appear worn, frayed or clogged for best results.
Store indoors
Keep the sander in a clean, dry place to prevent damage from moisture or temperature extremes which can damage motor and moving parts.
Check cords and wiring
Examine the power cords, plugs and wiring. Repair or replace damaged or frayed wiring to prevent dangerous shorts, shocks or fires.
Lubricate bearings
Periodically lubricate the motor bearings, bushings and other moving joints following the manufacturer’s guidance to prevent premature wear.
If your sander is overheating, vibrating excessively, leaving swirling marks or producing a burnt smell, turn off and inspect for issues. Replace worn parts, abrasives, or brushes as needed to get it running smoothly again.
Safety Tips for Drywall Sanding
In addition to wearing goggles and a dust mask, keep these safety tips in mind when using a drywall sander:
- Avoid wearing loose clothing that could catch in moving parts – wear well-fitting clothes.
- Make sure extension cords are rated for the electric load and free of damage.
- Unplug when changing paper discs, clearing jams or doing maintenance.
- Keep firm grip and proper footing on ladders when sanding overhead.
- Keep pole sander moving steadily – lingering in one spot overheats the motor.
- Make sure no insulation, wires or pipes are behind the drywall you’ll be sanding into.
- Allow the sander to stop fully before setting it down to prevent tipping over.
- Ventilate the room well and contain dust so it doesn’t drift to other rooms.
Stay alert and focused when operating the sander to avoid injuries or accidents. Always turn off and unplug completely before leaving it unattended or doing repairs.
Conclusion
While hand sanding drywall can produce adequate results for small jobs, using a drywall sander is far more efficient and effective for finishing larger areas and ceilings. The dust collection, variable speeds, and extended pole reach make drywall sanders well worth the investment, especially for frequent DIYers and professional contractors.
Carefully consider the project size, ceiling height, your budget, and other factors before deciding if purchasing a drywall sander is right for you. Compared to hand sanding’s inconsistent results and physical demands, drywall sanders provide major time savings, a flawless smooth finish, and less strain on your body despite the higher initial cost. With the right technique they are easy to master. Investing in a quality sander from a reputable brand will pay off with years of smooth results.