Which is better for you: Disc Sander or Belt Sander?
Are you struggling to decide between a disc sander and a belt sander for your woodworking projects?
Choosing the right tool can make all the difference in achieving a perfect finish. Both disc and belt sanders are essential in any woodworking workshop, but they serve different purposes and offer unique benefits.
Join us as we break down the key differences and provide practical insights to help you choose the right sander for your workshop.
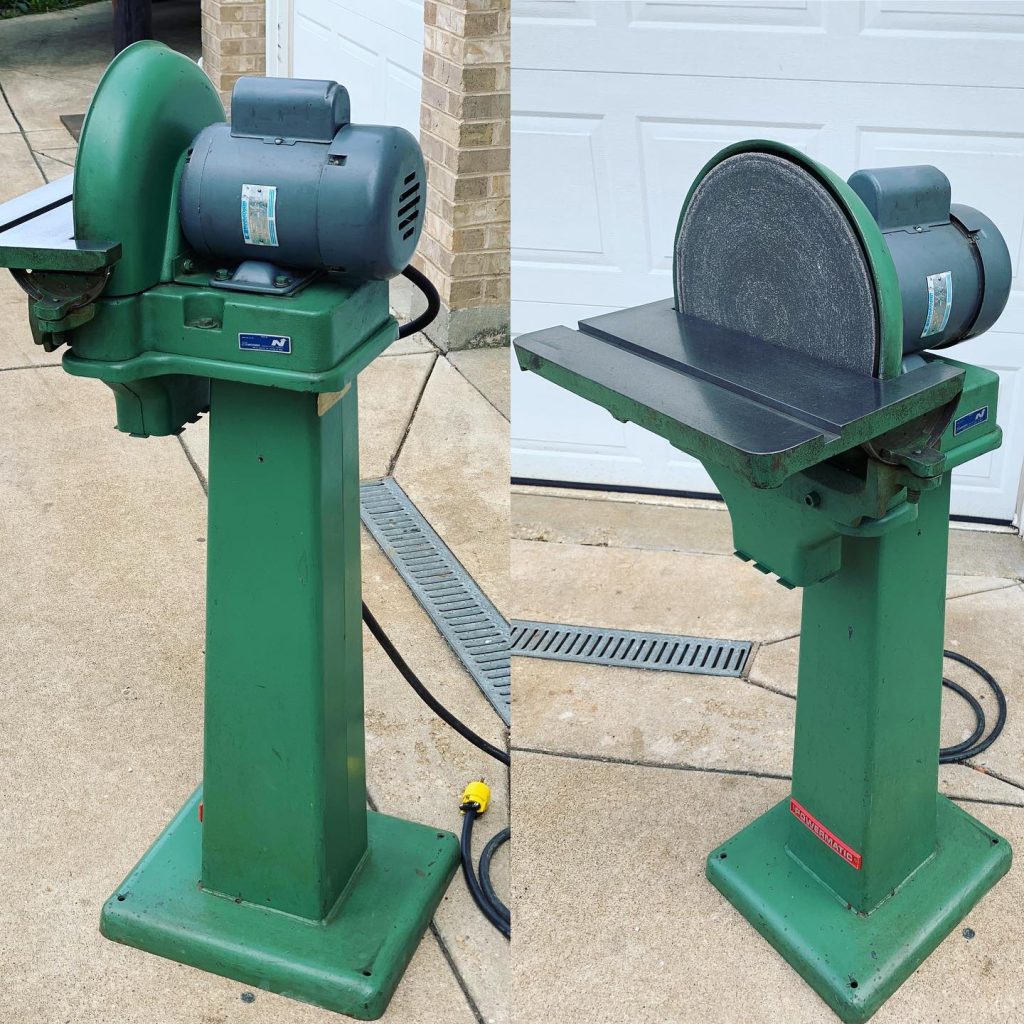
What is a Disc Sander?
A disc sander is a versatile tool for woodworking and metalworking. It features a circular abrasive disc that spins quickly on a flat surface. The disc is usually made of sandpaper or similar materials in various grits. This allows for different levels of material removal and finishing.
Disc sanders excel at smoothing edges and shaping small pieces. They quickly remove material and work great for end grain sanding. You can use them to create subtle rounded corners and polish surfaces effectively. Most disc sanders come with an adjustable work table for angled sanding. Many also include a miter gauge slot for precise angle work.
Key Features of a Disc Sander
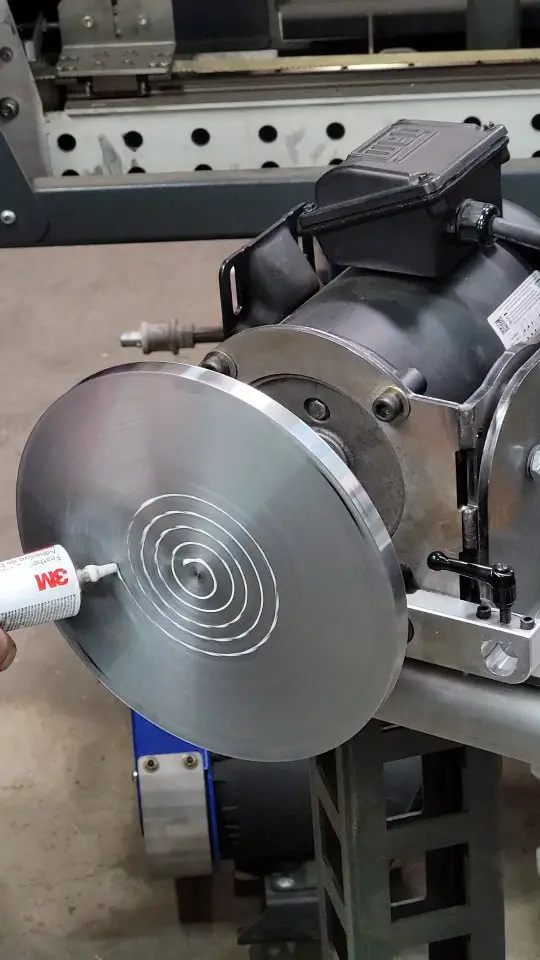
- Rotating circular sanding disc: A disc sander’s main feature is its spinning circular disc. This disc does all the sanding work. Disc sizes vary, usually between 5 to 12 inches across. Bigger discs are great for larger projects. They can smooth wide surfaces quickly. Whereas smaller discs work well for detailed tasks.
- Adjustable table: Disc sanders have a flat table that supports the work piece near the sanding disc. Better models allow you to bevel the table to sand angled edges.
- Dust collection: Most disc sanders connect to a shop vacuum to contain dust. Some have enclosed dust ports around the disc for more efficient dust pickup.
- 1/3 to 1 HP motor: Disc sanding requires less power. Motors range from 1/3 HP for basic 5″ models to 1 HP for heavy-duty 12″ disc sanders.
- Single sanding station: Disc sanders only have one sanding surface – the spinning disc. You can quickly swap discs for coarser or finer grits.
- Compact size: The circular sanding design allows disc sanders to be relatively small, often only taking up single square feet of shop space.

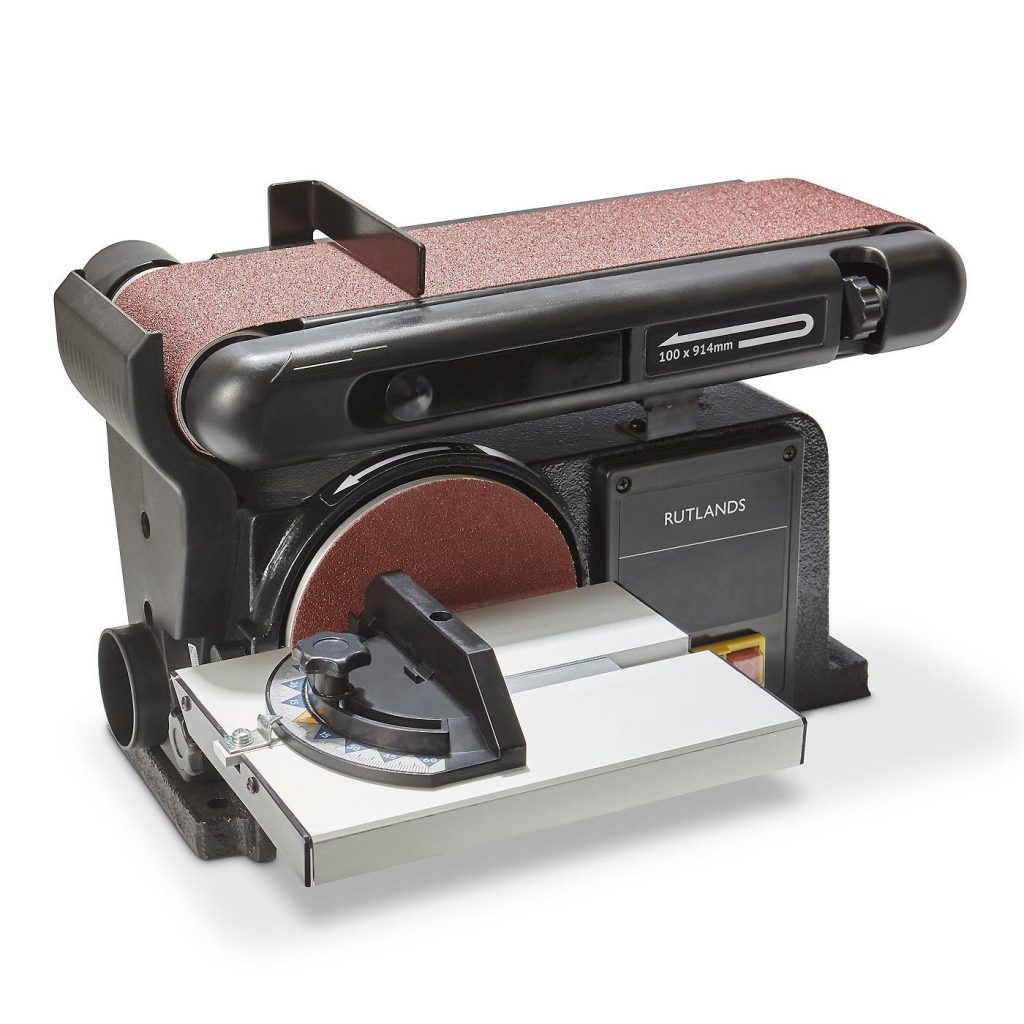
What is a Belt Sander?
A belt sander is a powerful tool used for smoothing and shaping wood or metal surfaces. It features a continuous abrasive belt that rotates around two or more wheels. The belt moves at high speeds, allowing for quick removal of material from work pieces. Belt sanders come in various sizes, from handheld models to large stationary machines.
They excel at smoothing large, flat surfaces and removing old finishes or paint quickly. Users can change the belt’s grit to suit different tasks, from rough sanding to fine finishing. Belt sanders are versatile and can handle both wood and metal materials with ease. However, they require careful handling to avoid damaging the work piece or creating uneven surfaces.
Key Features of a Belt Sander
- Continuous sanding belt: The main sanding surface is an endless loop abrasive belt that rotates at high speeds around two drums. Common belt sizes range from 3×18″ to 4×36″.
- Conveyor-belt action: As the belt rotates, it moves over the work surface like a conveyor belt. This allows you to feed the work piece linearly against the moving belt.
- Platen for support: Belt sanders have a special design to support your work. They feature a flat metal platen opposite the rear drum. This platen sits behind the sanding belt.Platens often pivot to sand angled work pieces.
- 1+ HP motor: The continuous belt requires more powerful motors than disc sanders. These motors typically start around 1 HP and can range up to 5+ HP for heavy stationary models.
- Multiple grits at once: Wider belts can have sections with different grits, like 80 grit on one end graduating to 120 grit on the other.
- Larger size: Belt sander bodies need to be long enough to tension the belt, so they have a larger footprint than disc sanders.
Belt Sander Images


Main Differences Between Disc and Belt Sanders
Now that we’ve covered the key features and capabilities of each type, let’s compare them directly to reveal the main differences:
Sanding Motion
- Disc sander: Unidirectional circular motion around the disc. Grit rotates in one direction under the work piece.
- Belt sander: Linear motion along length of the belt. Grit moves in linear path under work piece.
Sanding Orientation
- Disc sander: Work piece is perpendicular to the disc face. Only edge/face sanding is possible.
- Belt sander: Work piece is parallel to belt movement. Can edge sand or face sand depending on work piece orientation.
Power
- Disc sander: Typically lower powered motors less than 1 HP. Enough for light stock removal.
- Belt sander: More powerful 1 HP+ motors. Better for aggressive sanding/stock removal.
Sanding Area
- Disc sander: Small circular sanding area defined by disc size, usually 5-12 inches max.
- Belt sander: Large rectangular sanding area determined by belt length/width, typically 18-36″ long.
Dust Collection
- Disc sander: Partially enclosed disc requires shop vac for dust pickup. Significant dust escapes around disc.
- Belt sander: Fully enclosed belt creates less escaping dust. Some have built-in dust collectors.
Number of Grits
- Disc sander: Limited to a single grit at a time. Discs must be changed to switch grits.
- Belt sander: Wider belts can have multiple grit zones, allowing grit changes on the fly.
Learning Curve
- Disc sander: Very simple machine with a flat fixed table. Easier for beginners to learn.
- Belt sander: More adjustments and versatility require practice to master techniques. Steeper learning curve.
Cost
- Disc sander: Compact simple construction makes most models relatively affordable at $100-250.
- Belt sander: More parts/materials needed typically makes them cost $150-500+. Heavy-duty industrial belt sanders can cost thousands.
What are Disc Sanders Best For?
Thanks to their spinning circular sanding action, portable size, and ease of use, disc sanders excel at these key tasks:
Smoothing Curves and Contours
The circular sanding disc evenly sands both concave and convex curves along the edge of the workpiece. Its smooth, continuous motion helps prevent uneven scratches or ridges. The small disc is easy to control, making it ideal for smoothing inside curves and contours.
Sanding Circles and Arcs
The rotating disc action allows you to trace rounded arcs with precision. It also helps sand a shaped disc or ring down to a perfect circle. A disc sander is essential for any curved work.
Removing Saw Marks on Edges
The rapid, uni-directional grit removes saw blade marks quickly from lumber or plywood edges. The smooth edge also helps to prevent splinters. It reduces the chance of tear out during future cuts.
Detail Sanding Small Parts
The compact size and precision of a disc sander make it perfect for small parts. Its instant-stopping abrasive disc provides excellent control. This is especially useful for sanding parts to final tolerances.
Sanding Veneers or Thin Stock
The light material removal action of a disc prevents burning through thin stock. The fine grit discs are perfect for sanding fragile wood veneers down to a smooth finish.
Accessing Tight Areas
The compact circular disc can sand concave areas that would be hard to reach with a large belt sander. The smaller sanding area gives more precision on confined spaces.
Overall, disc sanders are simple to use for smoothing curves, sanding rounded edges, removing saw marks, detail sanding small parts, working with thin stock, and accessing tight spots.
What Are Belt Sanders Best For?
Meanwhile, belt sanders are the powerhouse workhorse for rapid stock removal thanks to these capabilities:
Aggressive Bulk Sanding
The powerful belt motor paired with wide coarse grits aggressively removes substantial material quickly. This makes belt sanders perfect for flattening rough lumber.
Sanding Large Flat Surfaces
The broad sanding belt can smooth panel stock wider than the small disc on a disc sander. Good for sanding tabletops, doors, and other large flat projects.
Sanding 90-Degree Angles
Drum sanders struggle to sand a perfect 90-degree inside corner. A belt sander belts allows you to precisely sand into a square angle.
Sanding with the Grain
The linear belt motion makes it easier to sand in the direction of the wood grain to avoid cross-grain scratches.
Flattening Warped Wood
The combination of power and wide sanding capacity lets a belt sander forcibly remove high spots and twist to flatten cupped or warped boards.
Shaping and Tapering
By angling the belt sander on edge, you can bevel or taper the face of a work piece in a controlled manner. The linear abrasion creates precise shaping.
Sanding Inside Recesses
While less maneuverable than a disc, belt sanders can access deeper hollows like mortises thanks to the linear travel of the grit.
Belt sanders are the best option for heavy stock removal and wide flat surfaces. They excel at creating precise 90-degree angles and smoothing wood grain. Belt sanders are also ideal for flattening, shaping, and interior sanding tasks.
Disc Sander vs Belt Sander: Which is Better for Fine Sanding/Finishing?
When it’s time for final smoothing and fine sanding before finishing, disc sanders have some advantages over belt sanders:
- The compact disc allows detailed sanding in tight spots or hollows that a belt can’t reach.
- Disc grit rotates slower than a fast belt which can burn delicate stock when not used carefully.
- Enclosed disc design contains more dust for clean sanding. Open belt throws more debris on the work piece.
- Cheap disc paper is fine for light final sanding while belts require higher-quality grit.
- Disc changes are fast for switching paper grades. Belts take longer to change and replace.
- Unidirectional disc motion creates a smoother uniform scratch pattern. Bidirectional belt movement leaves more swirl marks
Disc Sander vs Belt Sander: Which is Better for Metalworking?
Both disc and belt sanders can be used on metal for grinding, and trimming edges when paired with proper abrasive grits and compounds.
For metal tasks, belt sanders tend to be the better choice:
- More powerful belt motor and aggressive action removes metal stock faster.
- Variety of grits can be installed on wider belts for coarse grinding to fine polishing.
- Added features like platen tilts, work stops, and backer pads aid metal sanding.
- Metal dust collects cleanly in enclosed belt housing instead of flying around a disc.
However, disc sanders still play a role for metalworking in certain cases:
- Smoothing curved metal edges like tubes, rods, and rings.
- Accessing confined spaces like the inside of pipe fittings.
- Quickly chamfering holes and hardware.
- DIY buffing and polishing with lower-powered motors.
For serious shaping, grinding, and finishing metal, opt for a belt sander. But keep a disc sander on hand for especially metal sanding scenarios.
What are the Limitations of Disc Sanders?
While they excel at detail sanding, disc sanders do have some limitations to consider:
Only Edge/Face Sanding
Discs can only sand surfaces parallel to the face – you cannot sand ends or tops. Belt sanders allow more sanding angles.
Prone to Tilting/Tipping
Aggressive sideways pressure while sanding can torque the light disc machines and make them tip. Always brace securely.
Inconsistent Disc Speed
Cheaper models, worn motors, and overloaded circuits can cause the disc rpm to bog down during sanding.
Small Sanding Area
The compact circular disc prevents sanding larger work pieces. Average 5-9″ size limits surface area.
Slower Material Removal
Low-power motors and fine grits mean disc sanders are not made for rapid stock removal.
Exposed Abrasive
Lack of belt housing allows dust to escape. Significant cleanup required. Breathing protection recommended.
While excellent for detail work, the design of disc sanders restricts the stock removal rate, sanding angles, work piece size, and dust collection.
What Are the Limitations of Belt Sanders?
Belt sanders are powerful but do have some downsides:
Difficult on Irregular Shapes
The flat rectangular belt works well on flat stock with straight edges. Struggles on highly curved or contoured surfaces.
Leaves Swirl Marks
Bidirectional grit travel causes swirl patterns on the work surface. Requires an extra pass with a disc sander to remove.
Creates Edge Round-over
A new belt with square edges will quickly round over the edges of a work piece. Lighten pressure to avoid.
Requires Two Hands
Controlling a handheld belt sander takes two hands. One to guide, and one to stabilise on the work piece.
Messy Open Design
Dust escapes the back and below the belt. Some contain better than others but still messier than a disc.
Aggressive and Unforgiving
High sanding power demands care. A moment of inattention can create deep gouges in your work piece.
The size, power, and grip of belt sanders make them trickier for finesse work, rounding edges, producing swirls, and containing dust.
Advantages of Owning Both Sanders
Given the pros and cons of disc and belt sanders outlined above, there’s a strong case to be made for owning both:
- Disc for detailed fine sanding, curves, small parts.
- Belt for fast stock removal, wide surfaces, inside angles.
- Disc to remove belt swirl marks and round-overs.
- Belt for initial dimensioning of lumber and flattening.
- Disc for final smoothing before finishing.
- Belt for major material shaping before disc finessing.
Recommended Combo: 6″ Disc + 3″ x 21″ Belt
A good starter pair would be:
- 6″ disc sander like the WEN 6502 (around $100).
- 3″ x 21″ belt sander like the Makita 9403 (around $150).
The small but powerful disc excels at tight contours and curves. The compact belt handles minor stock removal on boards under 12″ wide. Both are inexpensive benchtop models good for hobbyists.
Upgrading to larger 8″ or 12″ disc sanders and 4″ x 24″ belt sanders will provide more sanding capacity for bigger projects.
Follow all manufacturer safety instructions. Remember that a moment of inattention can lead to accidental gouging or injury.
Maintenance Tips
With proper care disc and belt sanders will deliver years of smooth sanding:
Disc Sanders
- Blow out dust using compressed air.
- Lubricate the motor bearings every 6 months.
- Check the disc mount and backing pad for wear.
- Use quality sanding discs to avoid unevenness.
Belt Sanders
- Check belt tracking and tension.
- Clean dust buildup on rollers and housing.
- Inspect belts for damage like cracking.
- Change belts once they round over or wear thin in the middle.
- Lubricate platen guide rods.
Conclusion
Wrapping it up, both disc sanders and belt sanders have their unique strengths and applications in woodworking. Your choice between the two depends on your specific projects and needs. Disc sanders excel at detailed work, end grain sanding, and creating precise angles. They’re perfect for smaller tasks and fine finishing. Belt sanders, on the other hand, are ideal for large, flat surfaces and rapid material removal.
Consider keeping both in your workshop if possible. This way, you’ll have the right tool for any sanding job that comes your way. Remember, the key to great results is not just choosing the right sander, but also using it correctly and safely. With practice and the right tool, you’ll achieve professional-quality finishes on all your woodworking projects.
Find out if sanders are really as loud as you think here!